I woke up this morning to the peaceful sound of rain... only to realize that it was raining in my kitchen. I ran upstairs to knock on my neighbors door to see if they knew the cause of the water leaking into my place - no answer. I called my apartment management company who send someone right over. They inspected my place and went upstairs. It turns out my upstairs neighbor (who I've never met and hope never to meet) decided to stop the sink, leave the water on and take a nap. The maintenance man said when he got upstairs there was water flowing EVERYWHERE.... right down into my place. Idiot!!!

Thursday, December 30, 2010
Friday, December 17, 2010
Modern Swappers 2 - Items Sent
Today was the last day to send my package to my Modern Swappers partner. I stitched right down to the last possible moment and got it shipped off just in time. My partner should have there package Monday if all goes well at the USPS. I will share two items now and the rest of the package after I know my partner received the package in case she is checking my blog. I want some of it to be a surprise.
The main item is several things in one. I love the sewing machine cover I got in the last round of Modern Swappers it looks amazing in my sewing room but it spends a lot of its time off my machine because I am sewing so much. So I thought to myself what if a sewing machine cover could serve a duel purpose. Lots of people have been making weighted pin cushion thread catchers to sit beside you when you sew. So I combined the two. When it isn't covering your machine, it sits under your machine. I have thought about the fact that you might not want this directly in front of you, so partner if that is the case hopefully you have something you can weigh it down with and use along side of you. Also the pin cushion is held on with snaps so you can use it anywhere as just a pin cushion and the thread catcher is also held on with a snap to make emptying your scraps easier. Partner I hope you enjoy your sewing machine cover/pin cushion/thread catcher/notions holder... in one!


I also made a wall hanging to match the cover as a decoration for her sewing room. I embroidered 'sew' on some tiny hoops and attached them to a small quilt. I have had these teeny tiny buttons for a long time and finally found a cute use for them.


The rest of the swap includes some little surprises and 1 1/2 total yards of fabric. I love this swap and can't wait to do it again! Hopefully my package from my mystery partner arrives soon.... I CAN'T WAIT!!! People put together some great packages!
Sunday, December 12, 2010
Angry Birds Pillow
For all you Angry Birds fans out there! I personally am obsessed. Here is a project that I am really excited to share, because it turned out even better then I could have possibly hoped. Here is the front:

And the back (if only getting 3 stars was this easy!!!):

Here are some close up shots of the birds & pigs:


I also made a funny little tag to attach to the pillow here is a shot of front & back of the tag:


Happy Birthday, Alan! I hope you enjoy your pillow. I might have to invite myself over to visit it. Even though it was made with the intention of being a birthday gift I had a hard time parting with it.
Wednesday, December 8, 2010
The Pillow Talk {Swap} 4
I finally joined a round of The Pillow Talk {Swap}. I've been wanting to get in on one for a few months now. It is wrapping up and after going back and forth and back and forth on a design and fabrics, I finally dove in and created something that I was not so happy with. So I abandoned it and dove right back in and came up with something completely different, even with different fabric choices. I'm pretty happy with the outcome and hope to make myself one after the holidays.
Here it is:


Hope you like it partner! If not you can send it back!!
Saturday, December 4, 2010
Advent Calendar SYTYC Audition Project
So now that the voting is closed I am able to post my audition project I submitted for the blog contest So You Think You're Crafty! I was in the top 10 so I passed my audition!! The weekly challenges begin at the end of the month. Thanks to everyone who voted for me.
I have to tell you about the fabric geek out I had earlier in the week. I posted the SYTYC logo to my flickr account. I SWEAR that I left no hints about which project was mine and Laurie Wisbrun who designed the amazing Santa Donkey and Holiday Rain Boots fabric commented that, "I voted. And I'm pretty sure I could tell which one was yours :) So cute!!" I was pretty darn excited. I mean how cool is that? I love her fabrics and read her blog often!
Anyway here is the exact post from the SYTYC blog:
Christmas is right around the corner! I decided to make my niece an advent calendar. She is finally old enough to be able to understand counting down the days til Christmas, and hopefully old enough to be able to understand she can only have one small treat a day until Christmas. Luckily I don't have to be the person to re-explain this on a daily basis.

This calendar starts on the bottom at #24 and works backwards.


There is one pocket on the bottom with a card to my niece that reads "Naughty or Nice?". The card is for Christmas morning and will explain that if she has been "nice" she can trade it into her aunt for a big present!
Wednesday, December 1, 2010
Some recent sewing projects
First up is another installment of the Quilting Journey Round Robin Bee.
This is a block for Krista. She requested 14" blocks (square or rectangle as long as one side measured 14") She is a Kaffe fan and unfortunately I am not so I had a really hard time picking out fabrics.
 Below is my block (left) with Krista's block (right). I love how colorful her block is.
And here is the group so far:

Next I finished some fabric post cards for swap. They were supposed to be christmas or winter themed. The snowman one has "Think Snow" embroidered on the left hand side - it went to someone in Florida. I have three partners to send to. They left in the mail today. You can join our swap here.


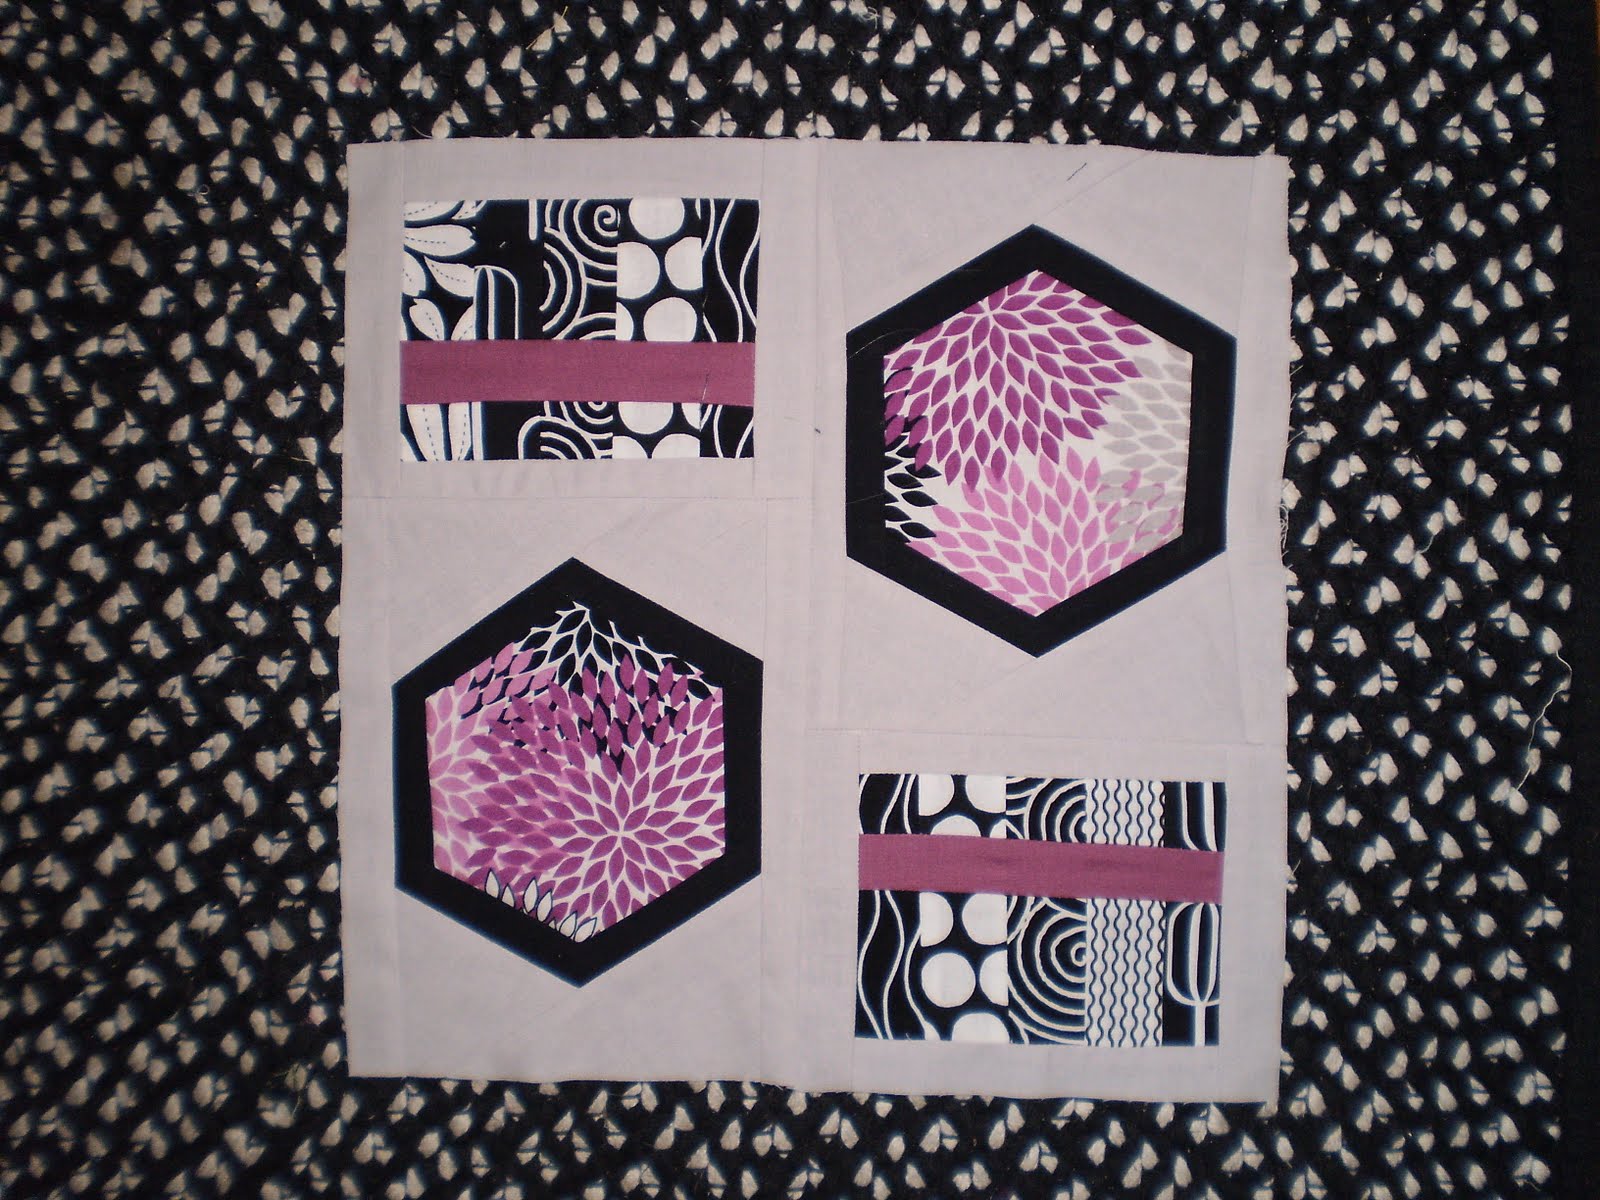
Finally for the 3x6 bee I signed up to make an angel block. An angel block is a block made for someone that had a partner not follow through and send them a block. I made it just like the blocks I made for the 3rd quarter. She picked the colors: purple, red, gray. I picked the fabric and block style. I love how this one turned out. You can sign up for the first quarter beginning in January here.

So much sewing to do so little time. I still need to finish up my 3x6 blocks for the 4th quarter due December 15. Also due that day is my pillow cover for the Pillow Talk Swap and my swap package for Modern Swappers. I'm also behind on November blocks for Sew to Speak but I hope to get those tomorrow. Then I should be done and able to focus on making some Christmas gifts just in time for the big day.
Tuesday, November 30, 2010
So You Think You Are Crafty!

Friday, November 5, 2010
Quilting Journey Bee
We are coming up on the halfway point for the Quilting Journey Bee. I recently finished up blocks for Elizabeth and Cindy.
Cindy wanted everyone to create blocks for her quilt neighborhood. Here is the progress so far:
 I looks so amazing in person. Some day I'm going to have to make a neighborhood quilt I think.
Here is the block I made for her quilt:


I thought our neighborhood needed a "local quilt shop". Where else are we going to get fabric??
I also finished up blocks for Elizabeth. Here is the progress of her quilt so far:

She sent along the bird fabric in the center of each block. Below is my block (right) and her starter block (left):

I am really enjoying this bee. I hear there are FOUR packages heading my way. I hope I can stay on top of them so more don't pile up.
Saturday, October 23, 2010
Pumpkin Time
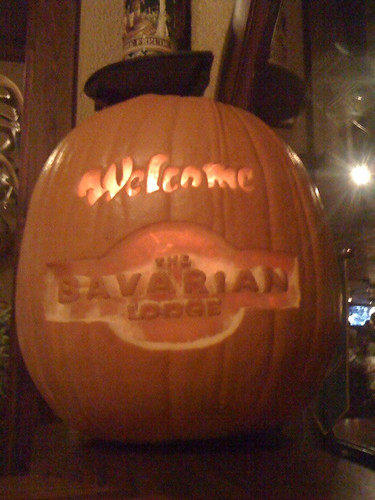
Switching from SavVy Seasons to Pumpkins... yes I'm going in reverse. Here are the pumpkins I carved for the restaurant/beer bar where I work, The Bavarian Lodge. The beer glass pumpkin sits in the decorative fire place at work and the welcome pumpkin sits on the front desk.
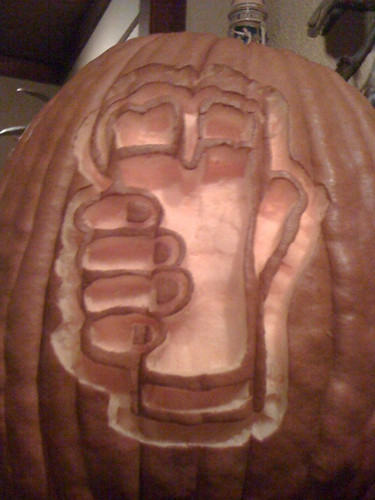
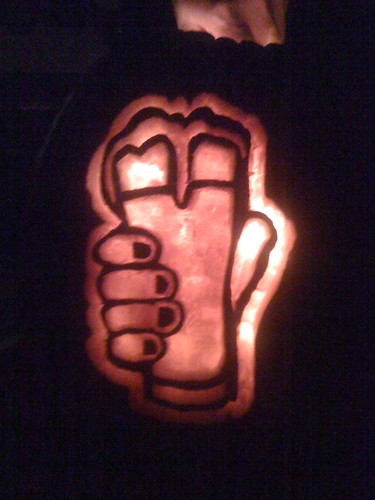

No I won't tell you how long I spent carving them. But I will tell you they were both finished in less then 24 hours and in that time period I slept, ate, showered, waked the dogs a couple of times and drove the hour to work... so not that long! I will also tell you that I intended on carving two more small pumpkins but my wrist wouldn't allow me to carve anymore. I guess it didn't appreciate how I was using it to carve the first two... oh well!
These pumpkins should last through Halloween with a little help from water and bleach. If you soak your pumpkin for 24 hours in a bucket of water with a bit of bleach it helps kill the bacteria that causes a pumpkin to rot. The water also helps keep the pumpkin alive just like flowers! I repeat this process every couple of days and keep the pumpkins refrigerated over night when they aren't soaking. They will last for several weeks this way and look perfect. It also helps to scrape as much of the insides out as possible, even scraping into the wall of the pumpkin to remove some of the excess pulp. I also make sure to scrape out any signs of rot on the inside of the pumpkin too.
Although next week if my wrist is up to it, I would like to carve a version of this image on a pumpkin:
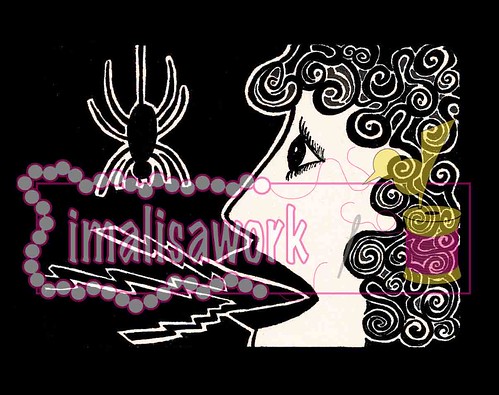
It is a beer coaster doodle I made a few years ago and I've wanted to put it on a pumpkin ever since.
Happy carving!
Tuesday, October 19, 2010
The SavVy {Seasons} Swap
I just mailed out my swap for The SavVy {Seasons}. I was a day late! But I have a really good excuse: It was my first time sewing binding on by hand. There was a bit of a learning curve and a lot of seam ripping but now I've got it down. Although this time took me a lot longer then I'd like to admit and left my hand aching I no longer fear the hand sewing! In the future it will go much smoother and that is exciting. I looked at a lot of videos and tutorials and found most of them to be very vague... until I happened upon this one and it made all the sense in the world. I just wish I had found it before I did an especially crappy job on two sides of my project, but those got ripped out and all is well.
So I guess I should show you the project since you still have no idea what it is. It was a table runner:
A Partridge in a Pear Tree Anyone?

Bird Detail:

Front & Back:

My new labels for my work. I ordered a swatch with my logo from Spoonflower:

I have also been trying to think of ways to use my precious Donkeys in Wellies fabric without compromising too many of the donkeys and here are two I came up with, an ornament and a mug rug.

But wait... there's more! I made these gift tags and I plan to make them for my own Christmas gifts.

Here is a pdf file of the tags I created in case anyone would like to make their own: Gift Tags.
Print these pages on card stock. On the pdf you will notice the first tag is larger with a grey border. Use this tag to cut pieces of fabric the appropriate size.
Then I used an actual tag to fold the fabric sides around and press them down. I folded the to long sides first, then the diagonal sides and finally the ends, the whole time using my iron to press the sides over. I then popped out the tag flipped it over starched it and gave it one final press from the top. The starch helps to hold folded under edges in place.
You can now sew or use steam a seam (which I did) to make any sort of fabric designs or use a whole piece of cute fabric and be done with it. Tip when placing your design make sure that the end with the diagonals is facing your left hand. That way the "To: & From:" isn't upside down when you flip the tag over.
Then just set the two on top of each other (wrong sides together) and sew an outline. Mine stayed together pretty well during sewing with no help, but I am thinking a piece of double sided tape will help anyone wary of this method. You can't pin because you will put a hole in the card stock.
I then snipped just inside of the circle on the tags and added a 3/16" eyelet. Add a string or a ribbon and your tags are ready to go!
Also, there a couple of small tags I added so I wouldn't waste space when they printed. Using a regular size tag as your cutting template should give you the top of a small gift tag.
My SavVy Seasons swap is complete! I can't wait to see what is coming to my house.

It's now off, I hope you enjoy partner!! Sorry the tree isn't for you it is just a prop for the photo!
Tuesday, September 28, 2010
Quilting: Quilting Bee - The Stitchin' Bee
I just finished this one up today for September in The Stitchin' Bee. "Auntem1" sent some fabric scraps and asked us to create a house for her quilt neighborhood. The block could be any size. We could piece, embroider, applique whatever we felt represented our style. So of course I appliqued.


I'm in a few bees and making a quilt neighborhood is a popular theme. There are tons of great house blocks out there. I've had the idea to make a tree house for a while. I'm glad I finally go to do it!
Tuesday, September 21, 2010
Quilting Bee Blocks
I just finished up two blocks today for Amy from Sew 2 Speak. She sent out black, white & gray fabrics and asked each member to add one color using modern fabrics from our own stashes. I was excited to do these blocks because Amy had an inspiration photo gallery on flickr and included several of the blocks members of The Hive created for my red bird blocks back in June. Here is what I came up with:

Friday, September 17, 2010
Upcoming Projects
Works In Progress
I haven't shown you anything I've been working on in a while. I really want to get both of these projects done asap so maybe if I post them I'll get to it!!!
First up, I really need a new lap top bag. My old one is falling apart (I carry it everyday) and it is just plain black so with my newly found appreciation for fabric that makes it suddenly boring! I finally have all the pieces I need to get going - including the perfect fabric!!! I hope it comes together well.

Someone get that dog out of the shot! No Lucky that isn't going to be a new dog bed.

I found some amazing laminated (!!!) Etsuko Furuya at The Needle Shop here in Chicago. It was a little pricey but it is a Japanese import fabric and laminated so it never had a shot at not being pricey. It will be totally worth it if this bag comes together like the picture in my head. The only problems I am foreseeing is one, pinning the pattern to this fabric... won't it leave holes in the plastic? I'll have to figure something out. Maybe I'll just tape it. The other problem is that I've never sewn a lap top bag, but I am familiar with patterns so hopefully this won't be problem.
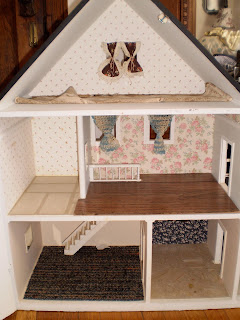
My other new project is fixing up a house!!! I have to paint the outside, plant flower boxes, put up new wall paper, fix the floors, make some quilts, make some curtains, reupholster chairs and couches, make pillows and rugs... the list goes on!

Ok so it is just a doll house for my niece, Laurel. A friend of my mom's gave it to her, but it is need of some serious updating. Having a huge doll house taking up space in my tiny apartment should be all the motivation I need to get it done. But I have lots of ideas, that had best be appreciated by the four-year old receiving it! Maybe there will be a no touching the doll house rule.


But wait the most exciting part is that she is getting her first sewing machine!!!!

Ok I better get to work!!
Subscribe to:
Posts (Atom)