Saturday, October 23, 2010

Pumpkin Time

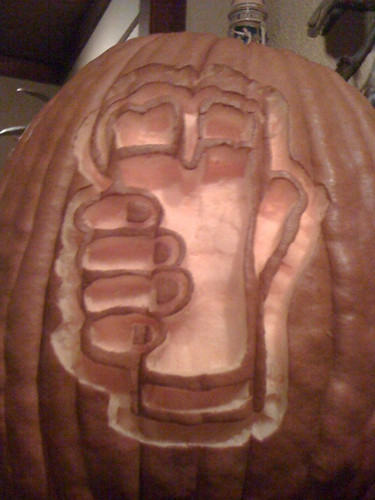
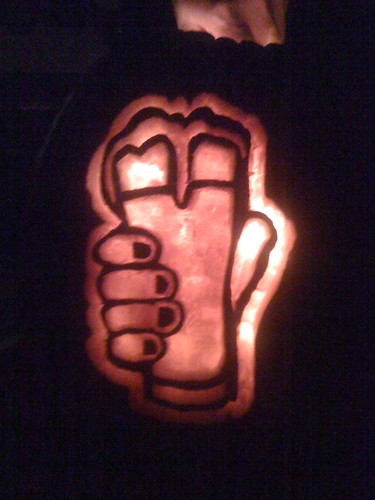
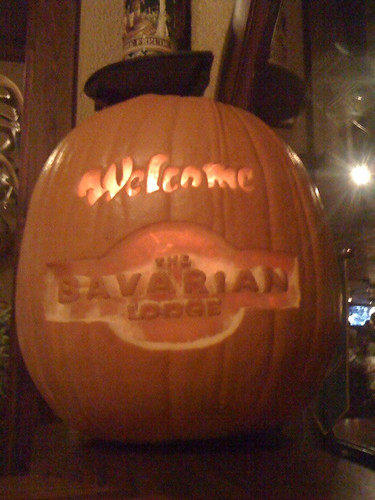
Switching from SavVy Seasons to Pumpkins... yes I'm going in reverse. Here are the pumpkins I carved for the restaurant/beer bar where I work, The Bavarian Lodge. The beer glass pumpkin sits in the decorative fire place at work and the welcome pumpkin sits on the front desk.

Beer Pumpkin

Beer Pumpkin

Welcome Pumpkin

Welcome Pumpkin

No I won't tell you how long I spent carving them. But I will tell you they were both finished in less then 24 hours and in that time period I slept, ate, showered, waked the dogs a couple of times and drove the hour to work... so not that long! I will also tell you that I intended on carving two more small pumpkins but my wrist wouldn't allow me to carve anymore. I guess it didn't appreciate how I was using it to carve the first two... oh well!

These pumpkins should last through Halloween with a little help from water and bleach. If you soak your pumpkin for 24 hours in a bucket of water with a bit of bleach it helps kill the bacteria that causes a pumpkin to rot. The water also helps keep the pumpkin alive just like flowers! I repeat this process every couple of days and keep the pumpkins refrigerated over night when they aren't soaking. They will last for several weeks this way and look perfect. It also helps to scrape as much of the insides out as possible, even scraping into the wall of the pumpkin to remove some of the excess pulp. I also make sure to scrape out any signs of rot on the inside of the pumpkin too.

Although next week if my wrist is up to it, I would like to carve a version of this image on a pumpkin:

Screamer

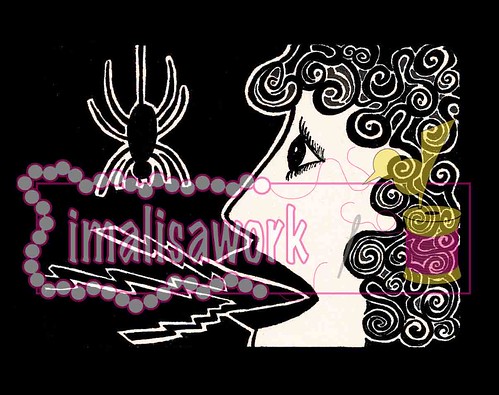
It is a beer coaster doodle I made a few years ago and I've wanted to put it on a pumpkin ever since.

Happy carving!

Tuesday, October 19, 2010

The SavVy {Seasons} Swap

I just mailed out my swap for The SavVy {Seasons}. I was a day late! But I have a really good excuse: It was my first time sewing binding on by hand. There was a bit of a learning curve and a lot of seam ripping but now I've got it down. Although this time took me a lot longer then I'd like to admit and left my hand aching I no longer fear the hand sewing! In the future it will go much smoother and that is exciting. I looked at a lot of videos and tutorials and found most of them to be very vague... until I happened upon this one and it made all the sense in the world. I just wish I had found it before I did an especially crappy job on two sides of my project, but those got ripped out and all is well.

So I guess I should show you the project since you still have no idea what it is. It was a table runner:

A Partridge in a Pear Tree Anyone?


Bird Detail:


Front & Back:

My new labels for my work. I ordered a swatch with my logo from Spoonflower:


I have also been trying to think of ways to use my precious Donkeys in Wellies fabric without compromising too many of the donkeys and here are two I came up with, an ornament and a mug rug.


But wait... there's more! I made these gift tags and I plan to make them for my own Christmas gifts.


Here is a pdf file of the tags I created in case anyone would like to make their own: Gift Tags.

Print these pages on card stock. On the pdf you will notice the first tag is larger with a grey border. Use this tag to cut pieces of fabric the appropriate size.

Then I used an actual tag to fold the fabric sides around and press them down. I folded the to long sides first, then the diagonal sides and finally the ends, the whole time using my iron to press the sides over. I then popped out the tag flipped it over starched it and gave it one final press from the top. The starch helps to hold folded under edges in place.

You can now sew or use steam a seam (which I did) to make any sort of fabric designs or use a whole piece of cute fabric and be done with it. Tip when placing your design make sure that the end with the diagonals is facing your left hand. That way the "To: & From:" isn't upside down when you flip the tag over.

Then just set the two on top of each other (wrong sides together) and sew an outline. Mine stayed together pretty well during sewing with no help, but I am thinking a piece of double sided tape will help anyone wary of this method. You can't pin because you will put a hole in the card stock.

I then snipped just inside of the circle on the tags and added a 3/16" eyelet. Add a string or a ribbon and your tags are ready to go!

Also, there a couple of small tags I added so I wouldn't waste space when they printed. Using a regular size tag as your cutting template should give you the top of a small gift tag.


My SavVy Seasons swap is complete! I can't wait to see what is coming to my house.


It's now off, I hope you enjoy partner!! Sorry the tree isn't for you it is just a prop for the photo!